Teapots are more than just vessels for brewing tea; they are iconic symbols of comfort, tradition, and elegance. Imagine the satisfaction of sipping freshly brewed tea from a teapot that you made with your own hands. Learning how to make a teapot involves mastering various pottery techniques.
From selecting the ideal clay and shaping it into a graceful form to mastering the intricate process of attaching handles and spouts, making a teapot is both an art and a science. This article will walk you through each stage of creating your very own teapot.
How to Make a Teapot
To create a pottery teapot, you’ll need to follow several steps in the pottery-making process. So let’s begin:
Step 1 – Weighing Out the Clay
To create a well-crafted teapot, the first step is crucial in determining its final quality – weighing out the clay. The type of clay chosen can greatly impact the overall appearance and functionality of the teapot. A high-quality clay with good plasticity is essential for shaping intricate designs and ensuring durability. When weighing out the clay, consider not only the necessary amount for the teapot body but also additional pieces like spouts and handles.
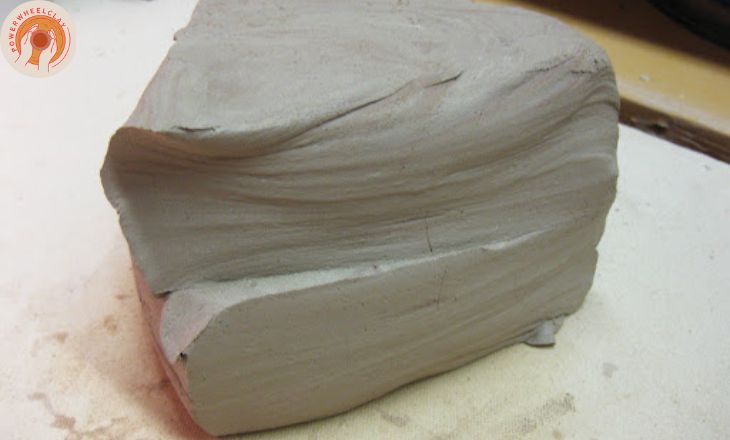
It’s important to accurately measure the clay to avoid any inconsistencies in thickness that could compromise the teapot’s structural integrity. By carefully calculating and portioning out the clay, you set a strong foundation for creating a unique, functional, and visually appealing teapot that will stand out in any collection or kitchen setting.
Step 2 – Starting to Pinch the Clay
The process of pinching the clay is very crucial. With the double pinch pot technique, you have the opportunity to infuse your own unique style and character into the design. Press your thumb into the center of the clay, feeling its malleability and responsiveness to your touch.
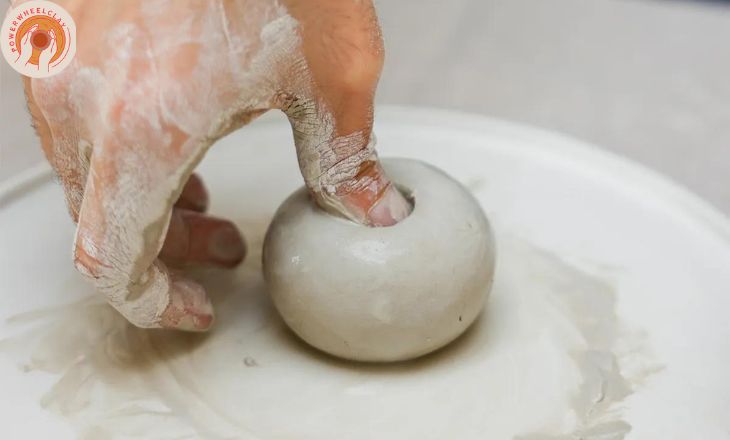
As you delicately pinch the clay, envision the shape of your teapot taking form with each gentle press. Embrace the sensation of the clay compressing under your fingertips, knowing that every subtle movement shapes the future vessel. In this moment of tactile artistry, consider how the thickness of the pot’s walls influences its functionality and aesthetic appeal. Strive for uniformity in your pinching technique to ensure a well-balanced structure.
Step 3 – Pinching out the Clay
Once your thumb has established the initial shape of the clay, the next step in creating a clay teapot is to pinch and mold the material into a bowl form delicately. This process requires using the entire length of your fingers and thumb to ensure an even distribution of pressure across the clay. By avoiding simply pinching with the tips of your fingers, you can prevent creating narrow weak spots in the structure of your clay bowl.
Remember that each pinch plays a crucial role in determining the final shape and strength of your clay vessel. Strive for a balanced approach as you work on expanding and refining the bowl shape. With thoughtful consideration given to every pinch, you can achieve a symmetrical and sturdy base for your teapot project.
Step 4 – Evening the Thickness of the Clay
Once the clay has been evenly rolled out, it’s crucial to ensure that its thickness is consistent throughout. This step requires finesse and attention to detail, as an uneven thickness can lead to structural issues in your final teapot. One technique to achieve this is gently pressing a rolling pin across the clay to create an even surface, taking care not to apply too much pressure.
Another method involves using calipers or rulers to measure the thickness at various points and adjust as needed. Remember that a uniform thickness will not only enhance the aesthetics of your teapot but also promote balanced heat distribution during firing.
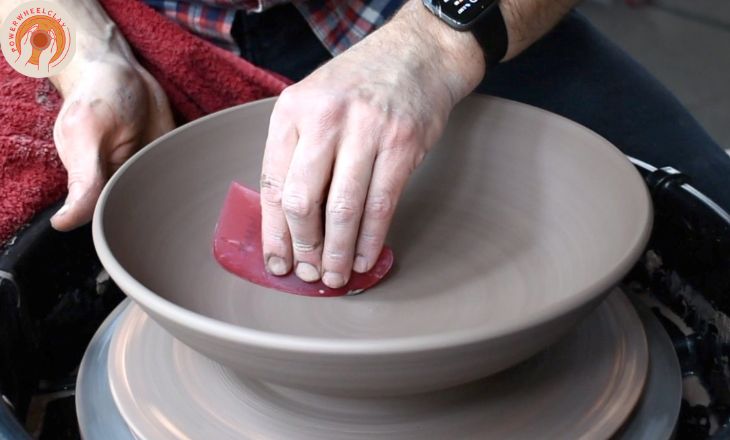
Step 5 – Smoothing out Cracks
Smoothing out cracks in your clay teapot may seem like a daunting task, but it’s a crucial step in achieving a polished final result. One approach is to use a damp sponge to gently press on the cracked surface, allowing the clay to blend together seamlessly. This technique not only smooths out imperfections but also adds a touch of character to your handmade creation.
Another method involves using fine-grit sandpaper to buff away any visible cracks or rough patches. Smooth out those cracks with care, turning potential flaws into artistic virtues in your clay teapot-making adventure.
Step 6 – Reshaping the Clay
In this step of how to make a clay teapot, reshaping the clay is where the magic truly happens. Utilizing sculpting tools, skilled hands gently mold and reshape the clay.
The process of reshaping allows for creative expression and a personal touch; every imperfection or asymmetry tells a story and adds character to the teapot. Embracing imperfections in this stage can result in a truly brilliant piece that reflects both craftsmanship and individuality.
Step 7 – Letting the Clay Firm Up
Once you’ve shaped your clay teapot, it’s time to let it firm up before moving on to the next step. This crucial stage allows the clay to dry slightly, making it easier to work with and less likely to lose its shape. Place the teapot in a cool, dry area and cover lightly with plastic or a damp cloth. Letting the clay firm up slowly will help prevent cracks and distortions as it dries.
During this phase, pay attention to any areas that may need additional support or shaping. You can gently mold the clay as needed while it firms up, ensuring that all parts of the teapot have a consistent thickness for even drying.
Step 8 – Smoothing the Inside of the Bowls
After shaping and drying the bowls, it is important to focus on smoothing their insides for a seamless finish. Using a fine-grit sandpaper or a damp sponge, gently rub the interior surface in circular motions to remove rough spots and imperfections. Pay close attention to detail to ensure that the inside of the bowl is as smooth as possible.
A well-smoothed surface will make cleaning easier and prevent food particles from getting trapped within any crevices, ensuring that your bowls remain hygienic and functional for everyday use. Remember, taking the extra time to smooth the inside of your clay bowls can truly elevate their quality and overall appearance.
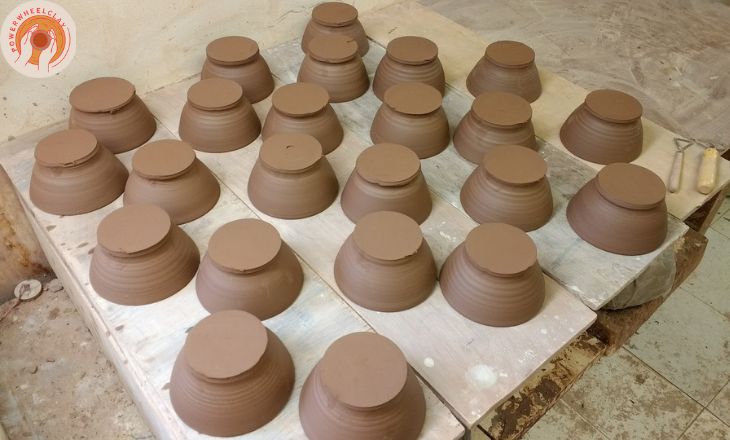
Step 9 – Lining Up the Bowls
Lining up the bowls is a crucial step in the intricate process of crafting a clay teapot. Each bowl must be carefully positioned to ensure they align perfectly, allowing for a seamless connection without any gaps or overlaps.
By taking the time to line up the bowls with meticulous attention to detail, you lay the foundation for a flawless final product. This step requires not only technical skill but also an artistic eye, as the alignment of the bowls can greatly impact the aesthetic appeal of the teapot. Remember, it’s these small details that differentiate a mediocre teapot from a work of art worthy of admiration.
Step 10 – Slip and Score
This crucial step involves scoring both surfaces that need to be joined, creating a texture that allows the slip (a liquid clay mixture) to act as a bonding agent. The key here is to ensure that your scored surfaces are not too dry or too moist, striking a delicate balance for a strong bond.
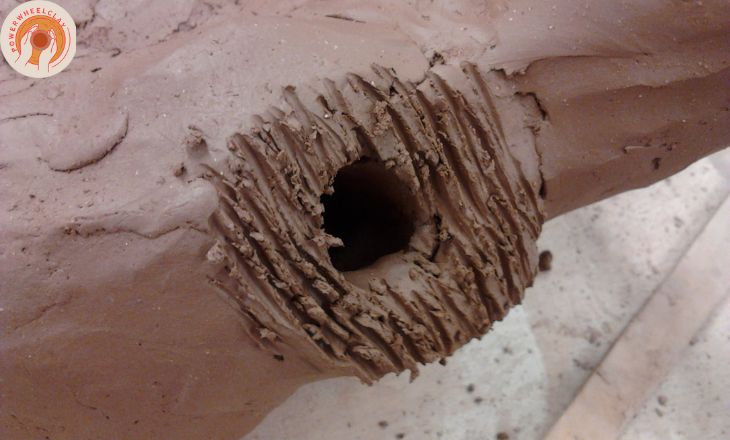
When applying the slip, make sure it’s not too thick or too thin; consistency is key in ensuring successful adhesion. This process requires precision and finesse, as any inconsistencies in scoring or applying the slip can compromise the structural integrity of your teapot.
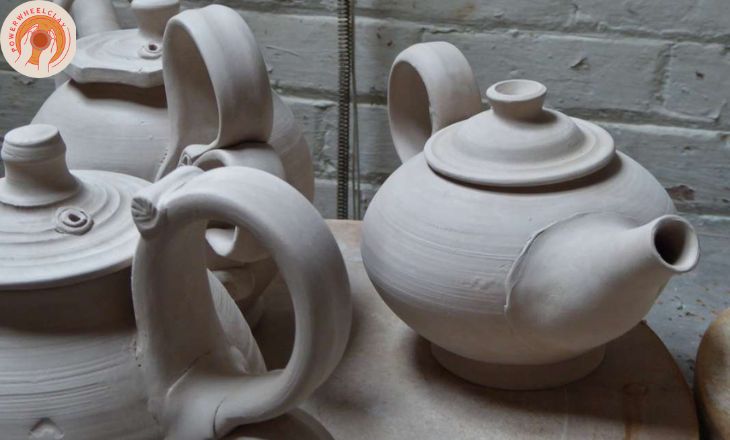
Step 11 – Joining the Bowls
When connecting the body and lid, it is essential to ensure a secure fit to prevent any leaks or imperfections in the final product. This stage also allows for artistic expression, as decorative elements can be incorporated into the design at this juncture.
One technique often used in joining bowls is scoring and slipping, where cross-hatches are etched into both surfaces before applying a slurry mixture for adhesion. Careful alignment and gentle pressure are necessary to fuse the pieces seamlessly. This step marks the transition from individual components to a unified teapot structure, marking progress toward completion.
Step 12 – Blending the Join
In this step, the focus shifts to blending the join where the spout and handle meet the body. To achieve a strong bond between these components, it is essential to carefully score and slip the joining surfaces before gently pressing them together.
Blending this joint not only enhances the structural integrity of the teapot but also contributes to its overall aesthetic appeal.
Step 13 – Reinforcing the Join
Once the clay teapot has been carefully assembled, it is crucial to reinforce the joint between the body and handle to ensure durability. One effective method is to apply slip, a liquid form of clay, along the connection. This slip not only reinforces the bond but also helps create a seamless finish on the surface.
Another technique for reinforcing the join is to gently score both surfaces before joining them together. By using a scoring tool or a sharp object to create small grooves, you provide more surface area for the clay particles to interlock, resulting in a stronger bond. Paying attention to this detail during assembly will not only enhance the structural integrity of your teapot but also contribute to its aesthetic beauty.
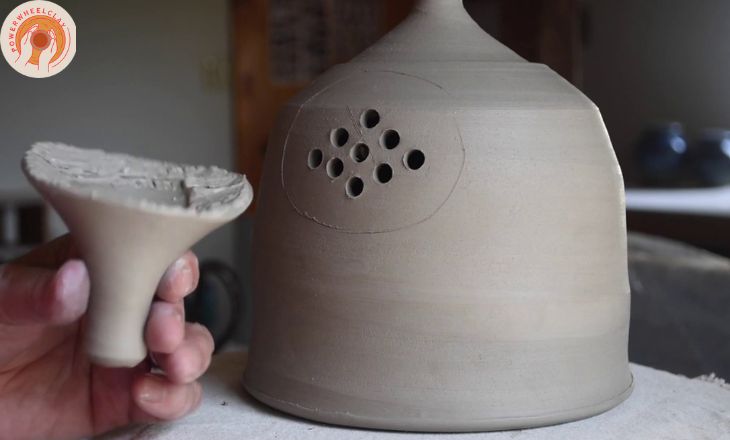
Step 14 – Marking the Top or Bottom of the Teapot
After meticulously shaping the body of your clay teapot, the next crucial step is marking the top or bottom. This not only adds a decorative touch but also serves as a practical guide for further detailing.
Choosing to mark the top signifies the opening where tea will be poured while marking the bottom designates the base that grounds your teapot firmly on surfaces.
Step 15 – Inflating the Balloon
Now that your clay teapot has been carefully sculpted and shaped, it’s time for the crucial step of inflating the balloon. In this step, you must delicately expand the clay without distorting its original form. The key here is to proceed slowly, applying gentle pressure to gradually inflate the clay while keeping a close eye on any potential weak spots or areas in need of reinforcement.
As you work through this step, consider how the process of inflating the balloon mirrors the growth and transformation inherent in creating a piece of pottery.
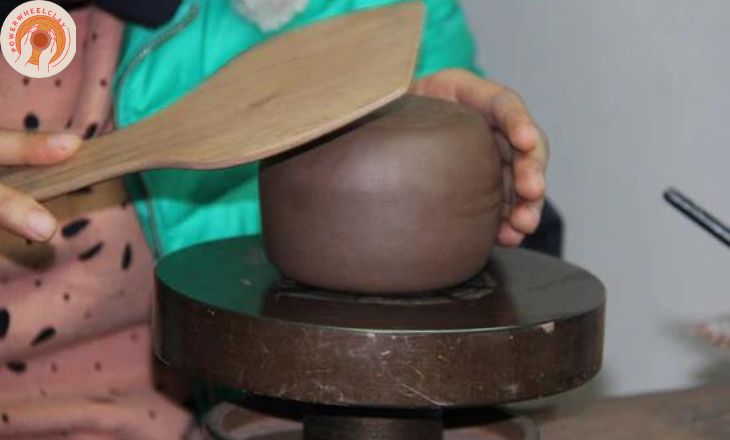
Step 16 – Smoothing the Teapot
it involves the crucial process of smoothing the surface to enhance the overall aesthetic appeal and functionality of the piece. Smoothing the teapot not only improves its visual appearance but also ensures a comfortable grip when handling the teapot.
A smooth finish is essential for both practicality and visual appeal, as it allows glazes or decorations to adhere evenly during firing. Taking time to achieve a polished surface can elevate your teapot from a simple vessel to a work of art that exudes craftsmanship and elegance.
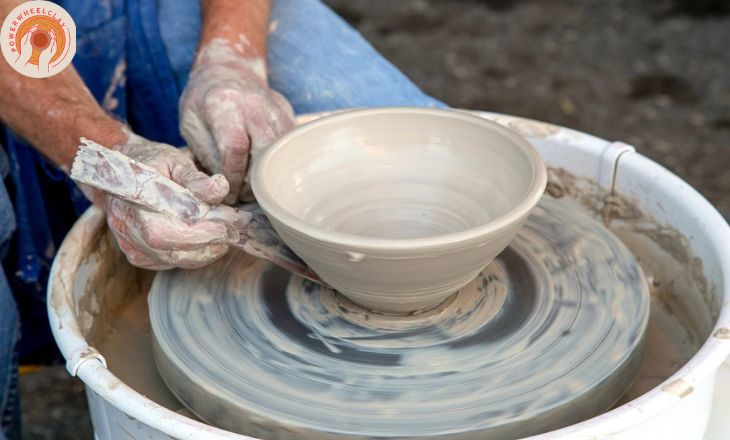
Step 17 – Shaping the Teapot
In this step consider shaping the body of the teapot. The potter carefully manipulates the clay, using different tools to create the desired shape and form of the teapot. It’s important to maintain symmetry and balance throughout this process, ensuring that the teapot not only looks appealing but also functions effectively.
One technique commonly used in shaping a teapot is coil construction, where coils of clay are built up to create the walls of the pot. This method allows for more control over the shape and size of the teapot, resulting in a unique and personalized final product. As each layer is added, it’s essential to smooth out any imperfections and refine the overall structure.
Step 18 – Making a Foot Ring
To begin, roll out a small slab of clay and cut it into a strip of desired thickness. Shape the strip into a ring that will fit snugly on the bottom of your teapot, providing support and balance.
The foot ring should be attached to the base of the teapot using a slip, gently smoothing out any seams or rough edges. Take care to ensure that the foot ring is securely attached and properly aligned with the body of the pot. Once in place, allow the foot ring to dry completely before proceeding with further detailing or glazing.
Step 19 – Attaching the Foot Ring
Once your clay teapot body has taken shape and hardened slightly, it’s time to attach the foot ring. This crucial step not only serves as a decorative element but also adds stability to your teapot, ensuring it rests comfortably on any surface. To begin, gently score both the bottom of your teapot and the foot ring with a scoring tool, creating tiny grooves for the clay to bond.
Next, apply a small amount of slip – a liquid mixture of clay and water – onto both scored areas before carefully pressing the foot ring onto the base of the teapot. Use your fingers to blend and smooth out any seams or imperfections where the two pieces meet. It’s essential to firmly secure the foot ring in place while maintaining the overall symmetry and aesthetic appeal of your teapot design.
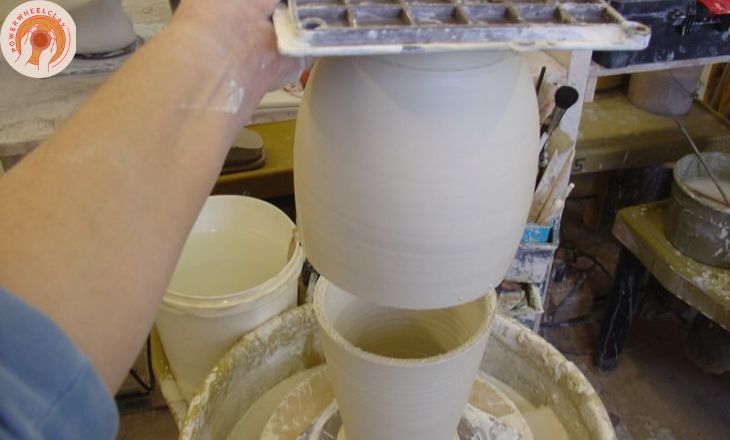
Step 20 – Making a Lid for the Teapot
To create a lid for your clay teapot, ensure that the dimensions match the opening of the body accurately. The lid should fit snugly but not too tight to allow steam to escape during brewing. A traditional method is to throw a disc of clay on the wheel and carefully trim it to achieve the desired size and shape for perfect functionality.
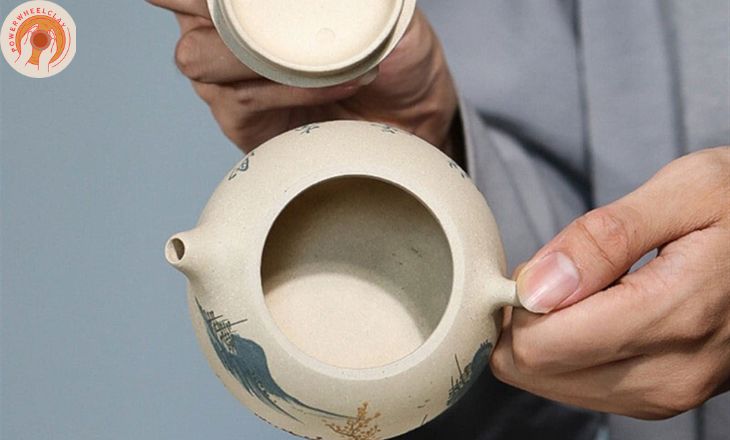
A Flush Teapot Lid
A flush teapot lid ensures a tight seal when brewing tea. To achieve a perfectly flush lid, it is important to carefully align and shape both the teapot body and lid during the hand-building process. This confirms that there are no gaps or spaces between the lid and the body of the teapot, allowing for maximum heat retention and flavor extraction during steeping.
A flush teapot lid can enhance the overall functionality of your clay teapot by preventing any potential leaks or spills while pouring tea. When fitting the lid onto the teapot, pay close attention to how it sits snugly and securely without wobbling or shifting.
Making a Lip for the Lid
When crafting a clay teapot, one essential aspect is creating a lip for the lid. To start, carefully shape a piece of clay into a rounded form that will fit snugly onto the lid. Next, attach this lip to the lid using slip—an adhesive made from water and clay—ensuring a tight seal to prevent any leaks during pouring.
Once the lip is securely attached, gently smooth out any rough edges or imperfections using a sponge or your fingers. This step not only refines the appearance of the lid but also ensures that it fits seamlessly onto the teapot.
Step 22 – Making a Knob for the Teapot Lid
It involves making the knob for the teapot lid. When crafting this small but essential component, consider not only its shape and size but also its ergonomic design.
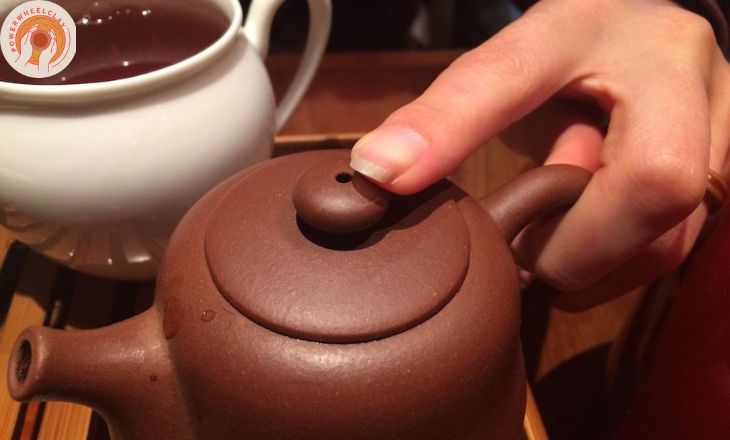
The knob should be easy to grasp and comfortable to hold, ensuring a seamless pouring experience when using your handmade teapot.
Step 23 – Making a Spout
It involves creating the spout, a crucial element that directly impacts the beauty of the final product. To fashion a well-designed spout, it is essential to consider its shape, length, and angle in relation to the teapot’s body. A perfectly crafted spout ensures smooth and precise pouring without any drips or leaks.
Step 24 – Making a Handle
After shaping the body of your clay teapot, it’s time to add a handle. When making a handle, consider the ergonomics – ensuring it feels comfortable and natural in the hand. You can experiment with different shapes and sizes to find what works best for your teapot.
One technique is to pull a tapered coil of clay and attach it securely to the teapot body, using slip as an adhesive. Smooth out any rough edges and ensure proper attachment for durability. Consider the angle at which you place the handle on the teapot – this can impact both usability and visual appeal.
Step 25 – Attaching a Spout
In this step consider attaching a spout. One key tip when attaching a spout is to score both surfaces that will be joined together, creating rough patches for the clay slip to adhere to. Another crucial aspect to consider is the angle at which you attach the spout. The angle can greatly impact not only the functionality but also the aesthetic appeal of your teapot.
After attaching the spout, envision how each component will work harmoniously together once your teapot is completed. Visualizing how tea will flow gracefully from the spout, inviting moments of relaxation and reflection for future users, adds depth and purpose to this seemingly technical step in pottery-making.
Step 26 – Attaching a Handle
When selecting the right handle for your teapot, consider its shape, and size, and how it complements the overall design. The handle should be securely attached to the body of the teapot, allowing for easy handling and comfortable pouring.
To attach the handle effectively, ensure that both surfaces are scored and slip is applied generously. Press the handle firmly onto the teapot body, using gentle pressure to create a seamless connection. Pay attention to the angle and positioning of the handle to enhance both visual balance and ergonomic comfort. Now the teapot is ready to use. How to use a teapot involves understanding its functionality and brewing tea effectively using the proper techniques.
Conclusion
Making a clay teapot can be a rewarding and enjoyable experience. By following this step-by-step guide, you can create a unique and functional piece of art that will enhance your tea-drinking rituals. Remember to take your time, pay attention to details, and enjoy the process of crafting something with your own hands.
Experiment with different designs, colors, and techniques to make your teapot truly unique. The proper drying and firing of the clay ensure the durability of your finished piece. So why not give it a try and unleash your creativity in the world of pottery today?
FAQs
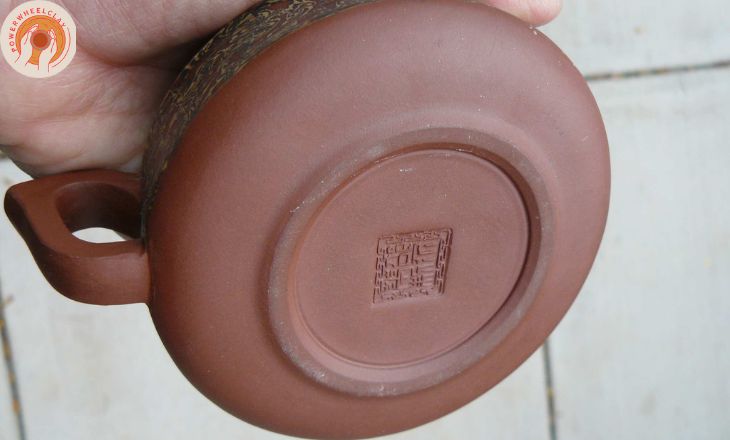
How Was The First Teapot Made?
One of the earliest known teapots is the Yixing teapot, which was made from a unique purple clay found only in the Yixing region of China. These teapots are highly prized for their ability to enhance the flavor of tea over time, as the porous nature of the clay absorbs some of the tea’s oils and flavors with each use.
What Are The 5 Parts Of a Teapot?
A teapot typically consists of five main parts: the spout, handle, lid, body, and base. The spout is the small opening on the teapot used for pouring tea. The handle is attached to the side of the teapot and provides a comfortable grip for pouring. The lid sits on top of the teapot’s body and helps retain heat while brewing tea. The body of the teapot is where the tea is brewed and stored. The base provides stability and support for the entire structure.
Why Did My Teapot Crack?
There are several reasons why a teapot may crack. One common reason is rapid temperature changes. If you pour boiling water into a cold teapot or place a hot teapot on a cold surface, the sudden change in temperature can cause the material to expand or contract quickly, leading to cracks. Another possible reason for a cracked teapot could be poor quality materials or manufacturing defects.