With the help of the unique and variable saggar firing technique, potters may add beautiful, visual effects to their creations. Simplifying the process with small, manageable aluminum saggars is one improvement method. Artists can easily make custom-sized saggars to fire their work using aluminum foil or small aluminum pans.
Saggar Firing
The element of surprise that saggar firing provides for painters is one of its primary appeals. The outcomes are frequently stunning and can give the ceramics breathtaking, unique finishes. Artists can add depth and intricacy to their creations by manipulating the arrangement and types of materials inside the saggar to create unique patterns and textures.
saggar firing provides artists with an avenue for exploration and innovation in ceramic art that continues to captivate both creators and viewers alike.
Different Ways to Make Saggars
Using paper clay to create saggars is one creative method. Using this method, clay and pulp from paper are combined to produce a saggar that is strong, lightweight, and resistant to high firing temperatures. The porous quality of the paper adds a surprising aspect to the finished piece by producing distinctive textural characteristics on the pottery’s surface.
Every saggar fire is a unique experience for the artist and spectator, as playing with different natural substances can produce unexpected and intriguing results.
How to Saggar Fire Pottery
Try Saggar firing pottery to get some interesting and striking effects. Using this specific method, clay pieces are placed into saggars, which are protective receptacles loaded with flammable materials like salt, sawdust, or metal salts. These substances react chemically during the saggar’s firing in the kiln, producing beautiful organic patterns and colors on the ceramic surfaces.
By carefully controlling factors such as kiln temperature for firing pottery and oxygen achieve a wide range of unique effects that make each piece one-of-a-kind.
Saggar Firing with Aluminum Foil
Saggar firing with aluminum foil is an innovative technique that yields stunning results in ceramics. By wrapping ceramic pieces in aluminum foil before placing them in the kiln, artists can create unique surface patterns and textures. The aluminum foil reacts with the heat of the kiln, leaving behind intricate markings and colors on the pottery.
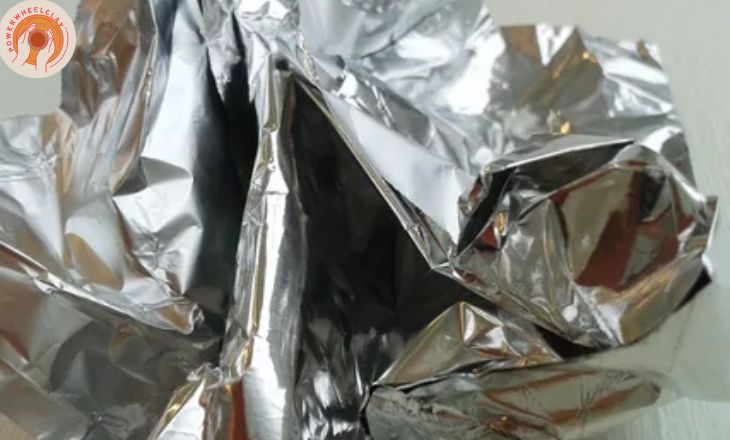
These are the procedures I use while using aluminum foil saggars for saggar fire.
Step 1 – Making Your Pots
Once you have gathered your materials and selected the perfect spot for your plants, it’s time to dive into the creative process of making your pots. Consider incorporating unique textures or patterns by using stamps or textured rollers on the clay before shaping it. This extra touch can add a personalized and artistic flair to your pots, setting them apart from store-bought options.
imperfections can often add character to handmade pots, so embrace any quirks or unexpected details that arise during the crafting process.
Enhance the aesthetic appeal of your pots by adding decorative elements like small beads, shells, or bits of glass embedded into the clay before firing. By infusing these personal touches into each pot you create, you transform them from mere containers for plants into cherished pieces of functional beauty in their own right.
Step 2 – Preparing the Materials
Once you have gathered all the necessary materials for your project, the next crucial step is to properly prepare them. Take some time to carefully inspect each item, ensuring they are in good condition and free from any defects. This initial evaluation will help you identify any potential issues that may arise during the construction process, allowing you to address them early on.
Consider creating a detailed inventory list of all the materials and tools you have gathered – this will not only help keep track of everything but also serve as a useful reference guide throughout the project. thorough preparation is key to a successful outcome – so invest time now to save time later.
Step 3 – Preparing the Pots
Once you have chosen the perfect pots for your plants, it’s time to prepare them for planting. Start by cleaning the pots thoroughly with soapy water to remove any dirt or debris that may harbor bacteria or pests. Next, check for drainage holes at the bottom of the pots to ensure proper water flow and prevent root rot.
If the pots don’t have drainage holes, consider drilling some in or adding a layer of gravel at the bottom to promote drainage. taking these steps to prepare your pots before planting, you set up your plants for success and encourage healthy growth in their new home.
Pouring the Ferric Chloride
Pouring the Ferric Chloride is a delicate process that requires precision and attention to detail. As the clear liquid flows from the container, a sense of anticipation fills the air. The chemical reaction that follows is mesmerizing to witness, as the solution changes color and begins its transformation into a powerful etchant.
Applying Materials to the Pot
When it comes to applying materials to pottery, the possibilities are endless. Experimenting with different glazes, slips, and textures can lead to unique and eye-catching results. Mixing your types of clay bodies or adding oxides to create striking colors adds a personal touch to your creations.
Step 4 – Making the Saggars
Creating saggars is a crucial step in pottery making that requires precision and skill. These vessels, made from fireclay, act as protective containers for the ceramics during firing in the kiln. The layering of sawdust, lumps of clay, and grog inside the saggar provides insulation to shield delicate pieces from direct contact with flames or potentially harmful gases present during firing.
This process not only ensures the integrity of the final product but also imparts unique patterns and effects on the pottery through controlled oxidation and reduction environments within each saggar. This element of unpredictability adds an exciting dimension to pottery-making by embracing natural processes in tandem with human artistry.
Step 5 – Firing the Saggars
A critical and skill-based element in the pottery-making process is the creation of saggars. These fireclay containers serve as a safeguard for the ceramics while they are being fired in the kiln. Inside the saggar, layers of sawdust, lumps of clay, and grog act as insulation, keeping delicate objects safe from flames or potentially dangerous fumes released during burning.
Guaranteeing the integrity of the finished product, this method gives each saggar a controlled oxidation and reduction environment that gives the pottery distinctive patterns and effects. This element of surprise embraces natural processes in concert with human skill, giving pottery-making an exciting new dimension.
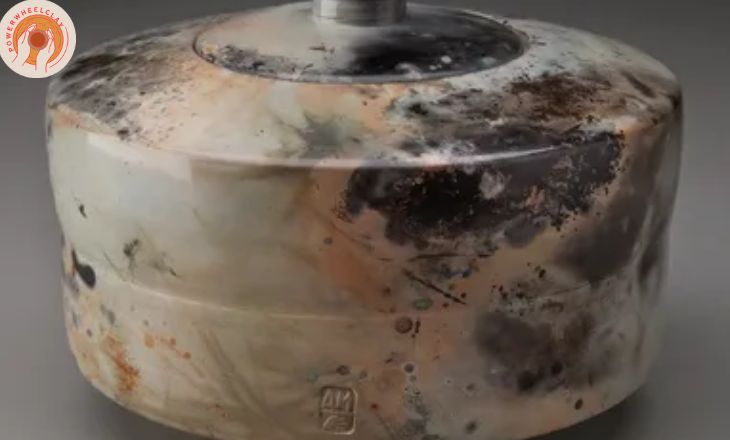
Step 6 – Finishing the Saggar Fired Pots
When the saggar firing is complete, the pots are ready to be displayed. An air of hope builds as you carefully open the saggar. The pots have a distinct, smokey patina that gives their surfaces more depth and character. For any ceramic artist, it’s a moment of absolute joy and fulfillment.
Conclusion
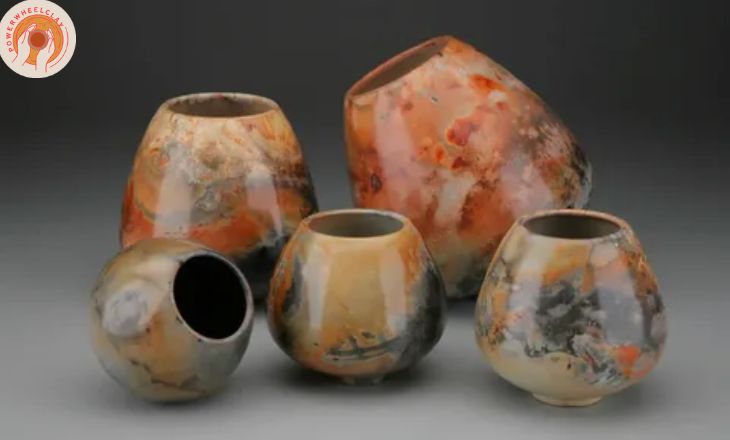
Saggar firing is a fascinating and versatile technique that allows for unique and unpredictable results in pottery. By following the steps outlined in this article on how to make simple aluminum saggars, artists can experiment with different materials and firing methods to achieve their desired effects.
With practice and creativity, artists can unlock the full potential of this ancient and intriguing pottery technique. Start experimenting with aluminum saggars today to add depth and character to your ceramic creations!
FAQs
What Is Saggar Firing?
Saggar firing is a technique used in pottery and ceramics where the pieces are fired inside a protective container called a saggar.
How do you use saggars in pottery?
Saggars are used in pottery to protect the pieces being fired from direct contact with the flames and ash in the kiln.