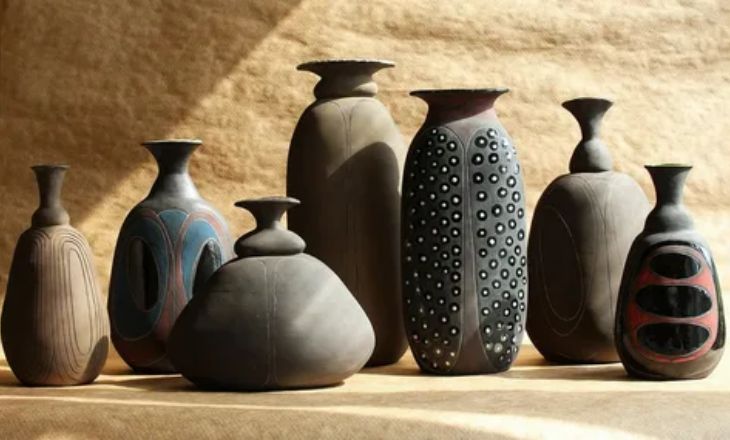
Slab building pottery for beginners provides a wonderful chance to use their creative faculties and create one-of-a-kind art. Painters may create several forms with sharp edges and clean lines, like plates, bowls, and Vases, by working with sheets of clay. Slab building has several advantages, one of which is the capacity for accuracy that makes it possible for novices to create pottery with standard sizes and shapes. We’ll cover that;
- What slab-building pottery is
- 2 An overview of the lesson
- 3The 7 days of building the project
- 4 And 3 fun ideas to try with your class
What Is The Slab Pottery Technique?
Marble building begins with smooth clay slab pottery that is carefully created and cut or might be created around molds. the tiles are built. With this method, longer designs that are impossible to produce on a wheel can be made.
mastering the art of slab pottery requires patience, attention to detail, and an understanding of how to work with this specific construction method. creating functional ware or exploring sculptural possibilities, this technique offers artists endless opportunities for self-expression through its unique approach to forming shapes with geometric precision. slab pottery that is used in the world.
Slab Pottery Lesson Plan
The goal of the pottery lesson plan is to promote students’ artistic expression and creativity while introducing them to the basics of working with clay. Students will study several pottery techniques,
including a coil, pinch, and wedge build, through practical exercises. With the use of these techniques, they will be able to produce beautiful or practical ceramic pieces, which will improve their sense of happiness and achievement. To help students improve their work, the lesson plan explores glass techniques and encourages them to play around with colors and textures.
The curriculum introduces students to different ceramic traditions from all over the globe, adding elements of art history. Students have a greater understanding of the rich history of ceramics by studying different customs and looking at historical artifacts. This not only increases their understanding.
Tools You’ll Need
- Clay
- As a big slab cutter for linen boards
- spray bottle grading device
Day #1: Play Day
The goal of the first slab construction method lesson is to engage students with clay. There are two methods I like to do this.
I give every student a ball of clay first. Spending more time with clay is important. Students become more comfortable with the clay the more time they spend working with it. And second, as the students get a feel for the material with their hands, I provide a short PowerPoint summary of clay. An example of the slides I provide is as follows.
After completing the presentation on Power Wheel Clay points. I go around talking to the students about the clay that they were given. The main goal of the first day is to teach your children on how to clean up after yourself. When it comes to working with clay, you should not disregard this section of my ceramic lesson plans.
Day #2: Art History & Sketch Design
Art History
Kids, IF you can catch them, have a decent attention span, in my experience. So I like to educate about things other than dates and artifacts on Art History Day. Finding someone with outrageous artwork and a solid background is ideal. You can use a narrative to draw in your students by showcasing an artist. Ask and you will acquire.
- 1 . How did they start producing art?
- 2. Why would they make such a piece?
- 3. Why would they make a piece like this?
When it comes to slab-building art history I would check out the following modern potters for a “wow” factor: You can introduce the kids to the more traditional parts of art history after you have won their interest. My goal is to discuss both functioning components and ancient history.
Slab Building History
It is said that the first slab-building pots made of slabs date back 18,000 years. Eastern Russia and Mesoamerica are the places with the highest numbers of old slab artifacts. Based on what has been discovered, it appears that the slab technique was less popular in early ceramics. Most of the ancient artifacts are coil or pinch pots.
Sketching The Design
We’re going to draw the sketch design of our project now that you’ve finished your course on the origins and historical style of slab building. If you teach actual novices, I strongly advise you to guide them through the drawing process and give students who are confident in their ceramic skills some leeway to express themselves creatively. Divide the sketch into its simplest parts. A thorough explanation must go with each line drawn.
Show the kids how to draw the lines both orally and visually. If there is a camera-projector setup available, I prefer to use it. If you have time, visit each student’s table and provide them with specific criticism regarding their sketches.
Day #3: Wedging And Slab Rolling
Many people underestimate the importance of proper wedging and slab rolling in pottery. but it plays a crucial role in the quality of the final piece. A well-wedged clay body not only results in smoother surfaces and finer details but also reduces the risk of cracks or deformities during firing. It requires patience and attention to detail, as even small air pockets left unaddressed can compromise the structural integrity of the piece later on. mastering the art of wedging and slab is truly foundational for any aspiring or experienced potter.
- Preparing the Clay
- Show your students the best practices for wedging the clay.
- Initiate the ball of clay.
- Press down in the center, away from your body, using the back of your hand.
- From the side that is farthest from your body, grab the clay.
- Next, rotating the clay, pick it up from the point that is closest away from you, and “roll” it toward you.
- Continue for multiple iterations.
- As the kids work, explain how the clay is softer, air bubbles are removed, and moisture flows properly through pressing.
- To keep surfaces clear and stop the clay from picking up any materials, I often use a vast cloth board.
Making A Clay Slab
- The clay slabs are what you need to start making next.
- First, have the children shape a piece of clay into a circle or square.
- Tell your kids that they should begin working with the clay slab slowly.
- Going too quickly may lead the links between particles of clay to break.
- Your students need to get up. As your class forms an oval or a cylinder, have them place their hand on top of it to begin. After that, slowly sit on top of the clay to flatten or compress it.
- Turn the clay oven and carry out step one again. As you move around the body pushing the clay, you should repeat this about four times. The clay will begin to resemble a slab. It is advised to work the clay’s body until it is about one inch thick. Just keep in mind that a larger piece will always be more difficult than a smaller one.
Your students need to get up. As your class forms an oval or a cylinder, have them place their hand on top of it to begin. After that, slowly sit on top of the clay to flatten or compress it. Turn the clay oven and carry out step one again As you move around the body pushing the clay, you should repeat this about four times. The clay will begin to resemble a slab. It is advised to work the clay’s body until it is about one inch thick. Just keep in mind that a larger piece will always be more difficult than a smaller one.
- The next step is to use a tool to balance out the thickness. Two choices are available
- Table slab wheels: To balance out the thickness, run your table slab roller through one.
- Small clay slab rolling elements: If you don’t have a table slab roller, you can use a portable model that resembles a rolling pin for the kitchen.
- Lastly, to keep oxygen from reaching the clay, store and seal the slab in plastic dents of this.
The clay will start to look like a slab. It is advised to work the clay’s body until it is about one inch thick. Just keep in mind that a larger piece will always be more difficult than a smaller one, and remind your students of this.
Day #4, #5, & 6: Cutting Slabs, Stages Of Clay, And Assemblage
Days 4 – 6 are dedicated to putting it all together. It’s where the slab cutting and 7 stages of clay construction start to take form. Here’s a common construction technique that I walk my students through.
Slab cutting in pottery is a transforming procedure that calls for skill and charm. Cutting through clay opens up a world of possibilities, enabling the potter to create one-of-a-kind shapes and surfaces. Every cut has the power to affect the final product, giving it more depth and personality. By careful manipulation of these slabs, potters can push the limits of conventional pottery techniques, producing remarkably unique designs that enthrall the observer.

The clay phases, which include several processes from preparation to fire, are an essential stages of the pottery-making process. Every step, from kneading and wedges to shaping and drying, requires care and close attention to precision. This artwork’s transformation from unrefined to refined depicts a nuanced dance between the artists.
This artwork’s transformation from unrefined to refined depicts a nuanced dance between the artists.
I attend work in class the next day. I take the material of the crafts and look at the clay. On the slab’s sides where the clay’s color is shifting, you should use a spray bottle to mist water. A small amount of mist should be used to match the color of the rest of the item.
In a side note, this is one of the more time-consuming aspects of teaching ceramics in the classroom for the teacher. Since students only come into my room a few times a week at most, I usually take care of the clay a lot. A studio ceramicist would not be bound by a school calendar!
Once the students come to class, ask them to construct the last few slabs you’ll need for the piece. Carry out the procedure again overnight.
- Allow the leather to harden.
- Cover with plastic so that air may flow.
- The next morning, spray to make sure the clay stays uniformly wet.
Day #7: Refining
so you have self-supporting clay jars that are for refining and taking shape. It’s almost time to load our artwork into the kiln, which is very exciting. Your students get the opportunity to polish their work on the seventh day of this slab construction assignment. Perhaps the clay moved during the drying process, or perhaps the assemblage didn’t proceed smoothly. Perhaps your pupil would like to include a special pattern. Day 7 is here for whatever it is.
Slab Pottery Ideas For Beginners
Adding ceramic elements to your landscape can make a big difference. planters go nicely with slab pottery ideas for beginners’ built structures. Try building a planter like this out of slabs. his excellent example from Etsy’s Slip and Weld.
Project Idea #1: Slab Built Planter
Adding ceramic elements to your landscape can make a big difference. planters go nicely with slab-built planter structures. Try building a planter like this out of slabs. his excellent example from Etsy’s Slip and Weld.
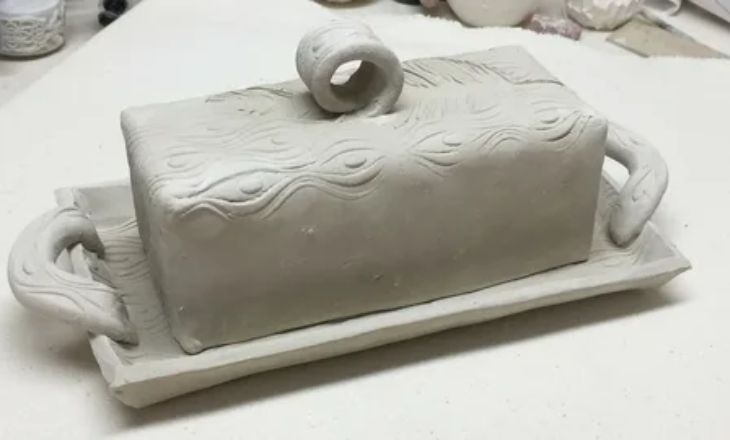
Project Idea #2: Slab Built Butter Dish
When their pupils bring something home, parents adore it! I’m just about serious. The project works well for beginners because of its Slub butter dish size.
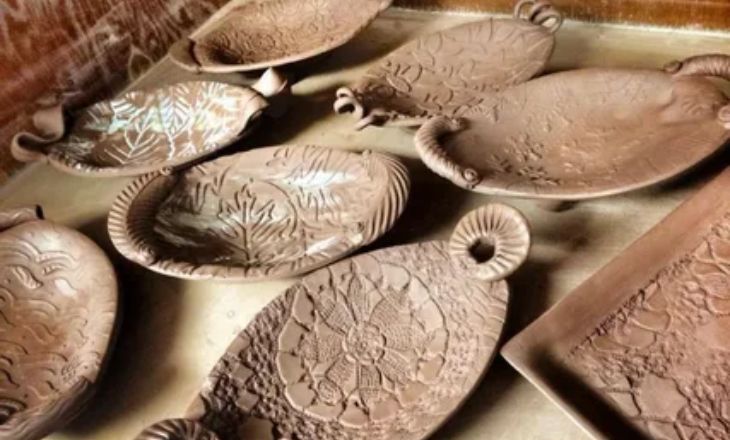
Project Idea #3: Slab Built Flat Plate
Slab Built Plates can be really challenging projects. yet are quite useful and can be straightforward. Thus, it’s a fantastic opportunity for pupils to create ceramics by hand.
Conclusion
That concludes the lesson! I hope it was really beneficial to you. There are undoubtedly methods to add a little additional difficulty to your course using texturing, hump molds, slump molds, and similar tools. Therefore, if you’re teaching an advanced level or your class is feeling daring, think about adding a design element to the flat surface.
Slab Building Pottery For Beginners will be delighted with the many possibilities for learning this flexible technique. as they invest themselves in the process of creating slab-built pottery.