Cutting clay into small pieces then rolling and pressing them together repeatedly to eliminate air bubbles and achieve a homogeneous consistency is the simplest method for wedge clay. This procedure aids in getting the clay ready for molding and shaping.
What Is Wedging Clay
The act of kneading clay by hand to eliminate air bubbles and guarantee a uniform bulk. Wedge two pieces of different colored clay together to see how long it takes to create a homogenous mass of clay. This is a delightful activity.
Why Wedge Clay?
Potters refer to the mixing and processing of clay as ‘wedging‘. By settling air bubbles and transforming the clay into a pliable and workable consistency, weeding gets the clay ready for wheel throwing and hand construction.
Three Reasons Of Clay
Wedge Clay is very important because it has three reasons.
Wedging Eliminates Air Bubbles and Bum
As you may know, air bubbles in your clay can cause catastrophic events in the kiln. When clay is left inert, air bubbles accumulate within it. Wedging correctly facilitates the expulsion of air bubbles. Lump removal is achieved by kneading the clay in a wedging pattern.
Wedging will eliminate the clay’s air bubbles. Avoid air bubbles when manufacturing pottery as they might lead to weak places or other issues. When discharged, some air bubbles could also cause issues. Some air bubbles will likely need to be removed if the clay is recycled or reclaimed.
Wedging Soft clay is produced during the wedging process, which makes it easier to work with. Wedging facilitates the bonding of clay particles, increasing the clay’s flexibility or plasticity. It would be difficult to make anything out of the plastic state without it, if clay is woven throughout the entire mass, it will become homogenized or have a uniform, smooth consistency.
Wedging Evenly Distributes Moisture
The amount of moisture that clay can hold is essential for working with it. For your pottery to not break, you want the clay to dry uniformly. However, moisture can collect in some areas like anything else.
During the drying process of pottery, wedged clay creates a homogenous mass by distributing moisture throughout the material.
Potters and painters are given a wide types of clay forms to select from. Its clay is one kind of this kind, known for its pores and colorful glazes. I can get a greater degree of precision and authority over what I create when I incorporate this method into my process.
Getting Set Up
Make sure you have the right surface. You want to avoid having a surface that would cause the clay to stick. I will often use a large canvas board or a wedging board to keep surfaces clean and to prevent the clay from picking up any materials. You can often find something that works at a hardware store. I’ve seen some use more common things like plasterboard as a wedging surface.
The Great Pottery Throw Down season 5 is extremely captivating. The political skill and originality were present from the very first show.
TIP;
If you go to a pottery studio, you might have access to a wedging table. Look for it next time you’re there. It’ll be a good surface for wedging and will save your back a good deal of pain.
A tip that will help is to use your body weight and not just your arms.
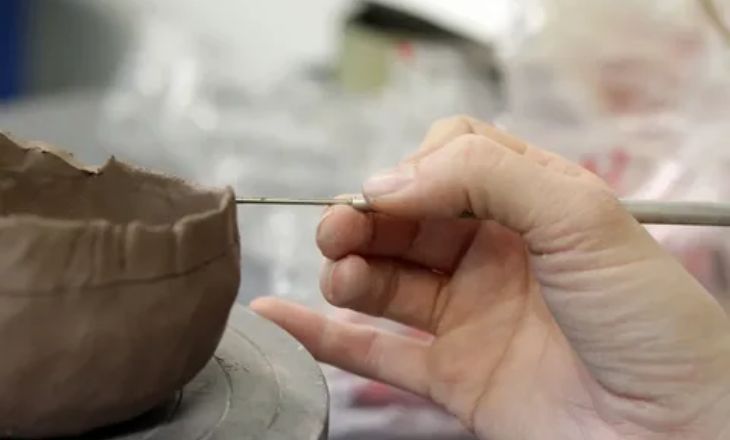
How To Wedge Clay
To guarantee that the clay is ready to be worked into a piece, there are several different wedging procedures. These are the top four (plus an extra choice).
Ox-Head Or Ram Heads.
Ox-head wedging is a technique where you continuously rotate the clay while pressing with your palms Because of the shape the clay adopts, it is frequently referred to as the “ox-head method” or “ram’s head wedging.”
Green pottery, sometimes referred to as Greenware ceramics, is a unique kind of pottery work that has grown in popularity recently.
Spiral Wedging
Spiral wedge uses a rocking motion with your hands gripping the clay at the top and pressing the wedging clay down a little to the left using the spiral wedge technique, the potter kneads the clay in a spiral or circular motion. Using the clay, twist it either clockwise or counterclockwise. The clay will spiral in shape. Continue until all of the clay has been combined.
Pottery painting ideas are not just a fun and creative activity; they also allow for endless possibilities in terms of design and expression.
interesting ideas for pottery painting is to incorporate nature-inspired designs into your artwork.
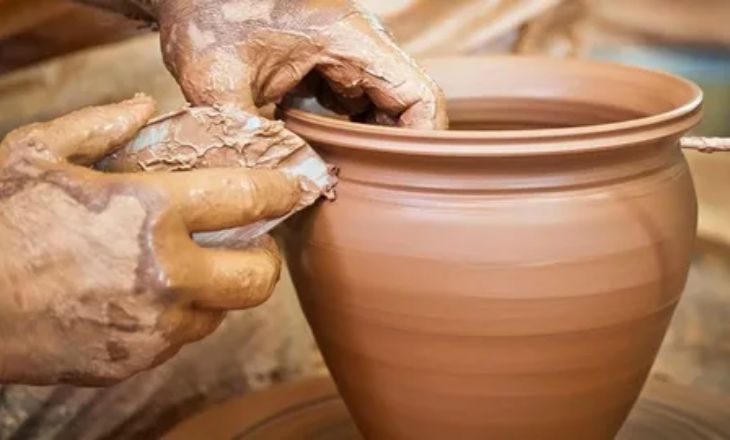
Wheel Wedging
One method for readying a clay body for vessel throwing is wheel wedging. Rather than relying on your body weight and arm power, you will use the pottery wheel. Using the wheel, form the clay clump into a cone shape by pulling the clay from the bottom to the top.
One method for readying a clay body for vessel throwing is wheel wedging. Rather than relying on your body weight and arm power, you will use the pottery wheel. Using the wheel, form your clay clump into a cone shape by drawing the clay from the bottom of the clump.
OA clay body can be made ready for vessel throwing by using a method called wheel wedging. Instead of using your arm power and body weight, you will utilize the pottery wheel.
The Great Pottery Throw Down cast has undoubtedly captured the hearts of pottery enthusiasts across the globe. Each member brings a unique set of skills,
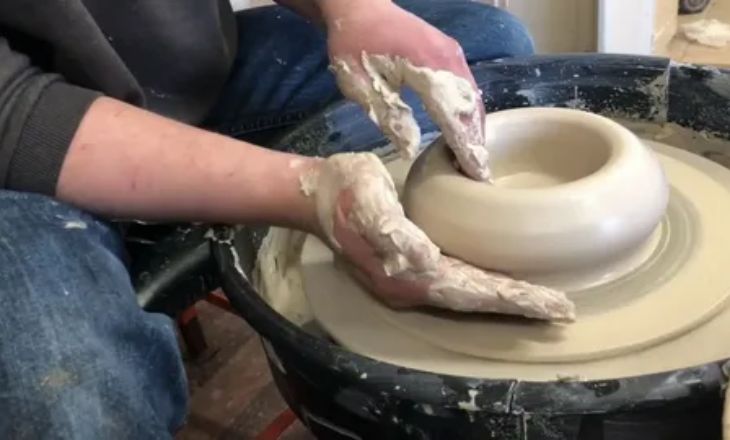
Stack And Slam Wedging
Stack And Slam Wedging clay clump into a cone shape by pulling the clay from the bottom to the top. By going through this procedure again, the clay particles align and the material becomes more malleable. When they are throwing a lot of the same objects on the wheel, I observe that most potters use this method.
For example, a bat placing two clay bricks on top of one another and tossing them onto a level surface is known as “stack and slam wedging.” This type of wedging is known by many potters as “wire wedging.”
That’s because, as you can see in the video below, you will split a piece of clay in two between each “slam” using a cutting wire or wire tool. Everything will become clear.
The stack and slam method swiftly blends clay with varying moisture contents and colors while producing homogeneous clay.ch of the same dish or coffee mug or same blow.
Bonus: Pug Mill (You Fancy)
Place two clay blocks side by side on your surface to begin. Take one of the blocks in your hands and toss it hard against the other block. At this moment, you should observe that the clay adheres to one another and forms a single block.
After that, turn the block 180 degrees by picking it up. The portion that was previously on top needs to be pointing downhill. Forcefully toss the brick onto the ground.
A clay wedging device that mixes clay for you is called a pug mill or pug mixer. De-airing and lump removal are better done by a machine. Of course, this is the most effective way to wedge, but the machines are not cheap. On Block’s Take cautious not to crumple your clay. As a result, air pockets will form.
Try not to press your clay too firmly. Your ram’s head shouldn’t appear to have been struck by a car. Make sure there is enough space between your hands. The ram’s horns will eventually splay too much.
website, one is available for viewing. Honestly, the only places I’ve seen a machine like this are in larger pottery enterprises and studios. Neither my local pottery studio nor the art department at my college had one when I was a student.
Avoid these mistakes when dying clay
For optimal outcomes, maintain a constant force applied when pushing down. The lump of clay should not be compressed during the initial rounds of wedging. Having a uniform consistency with every touch is preferable.
Go slow and apply less pressure to ensure quality work. Yes, wedging correctly takes a lot of time, but in the end, it saves you a ton of agony. Folding the clay oven upon itself is a simple process. Avoid it! The clay forms air pockets as it is folded. Make sure the clay is being pushed in. Take caution not to crumple your clay. As a result, air pockets will form.
Try not to press your clay too firmly. Your ram’s head shouldn’t appear to have been struck by a car. Make sure there is enough space between your hands. The ram’s horns will eventually splay too much.
Conclusion
It’s crucial to make sure your wedge clay is in good enough shape to form a pot. The first stage of a successful project is to decide whether to wedge on the wheel or use the ram’s head wedge.
The main goal of wedging clay is to achieve a uniform consistency and eliminate air bubbles. This is crucial for creating successful pottery pieces. When the clay is well wedged, it becomes more pliable and easier to work with on the potter’s wheel or by hand.
FAQs
What can I wedge clay on at home?
Every potter needs a surface to wedge clay on, and there are many different types. The most common are plaster, plaster covered in canvas, and plywood covered in canvas.
What is the process of wedging?
It is the process of removing any air from within the clay.